A Low-Poly Mushroom
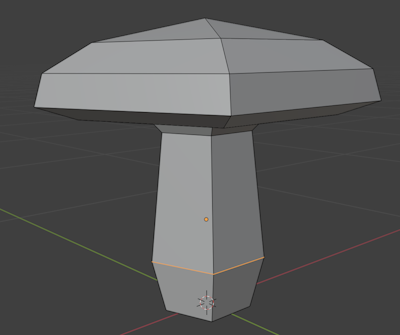
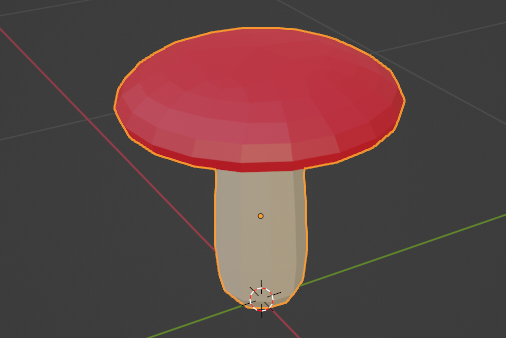
In this guide we’ll make a low-poly mushroom like this:
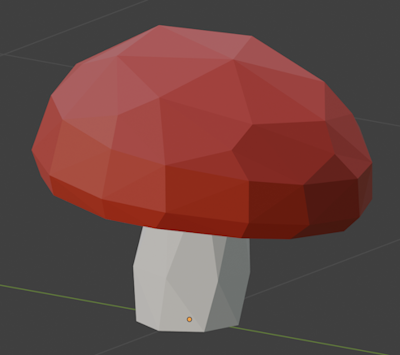
-
Start Blender
- Select the default Cube
- Press
X, thenEnterto delete the Cube
Add a Cylinder
- Press
Shift+Ato open the Add menu
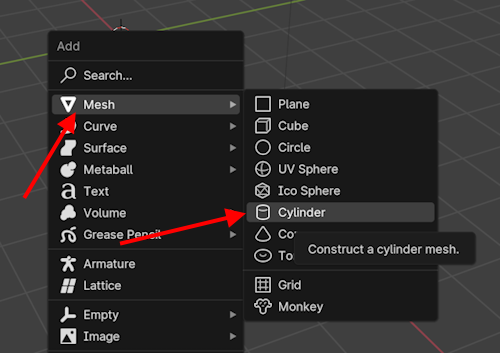
-
Choose
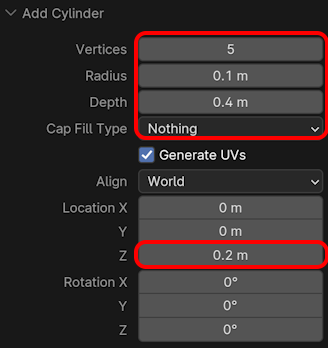
MeshthenCylinder - In the
Add Cylinderoptions, set the following:- Vertices: 5
- Radius: 0.1m
- Depth: 0.4m
- Cap Fill Type: Nothing
- Location Z: 0.2m
- Click
anywhereor pressEnterto accept the changes
The options appear in the bottom-left operator panel right after adding the cylinder. If it closes, press
F9or chooseEditthenAdjust Last Operationbefore doing anything else.
It will be rather small, but should look something like this:
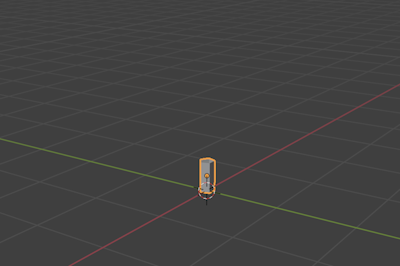
Since we’re going for a low-poly look, 5 is a good start here. But even for a high-poly design this is not a bad starting value since we can add more polygons later with modifiers. Also, for the initial size (Radius, Depth), we’re just going for something that’s smaller than a typical character (1-2m tall).
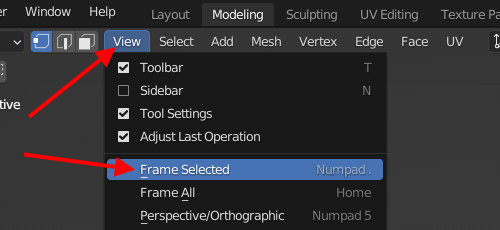
Frame Selected
- From the
Viewmenu, chooseFrame Selectedto zoom in on your newly created cylinder
- You may want to zoom out a bit. Use the
Mouse Wheelon Windows orCmd+Two Finger dragon Mac.
Edit Mode
- Press the
Tabkey to enter Edit Mode, or use theInteraction Modeswitcher:
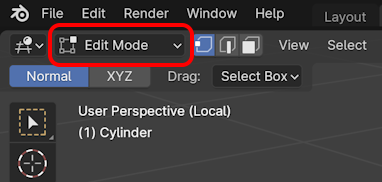
- Press the
2key to switch toEdge Selection Mode
Extrude and Scale
We’ll now build the basic shape of our mushroom.
Don’t worry if it doesn’t turn out exactly right on the first try. We’ll tweak the shape later.
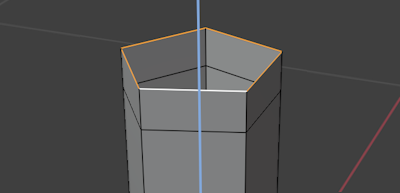
Alt + Left-Clickon one of the top edges on your cylinder:
- Press
Eto start extruding - Move your mouse up a bit
- Press
Zto restrict extrusion to the Z axis (up/down) Left-Clickwhen you have something like this:
- Press
Sto scale, and make the loop larger Left-Clickwhen you have something like this:

- Press
E, thenZto extrude along Z again - This time, move down a bit
Left-Clickwhen you have something like this:
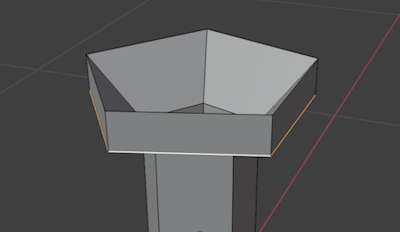
Sto scale again:Left-Clickwhen you have something like this:
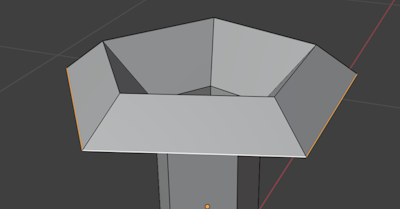
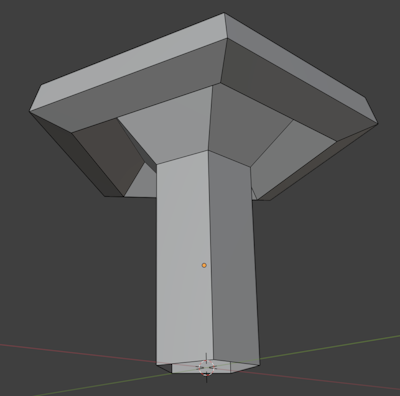
- Repeat Extruding and Scaling 4 times to get something like this:
Avoid creating too many steps. In Blender, it’s generally an advantage to start out with as little geometry as possible, and then add details later.
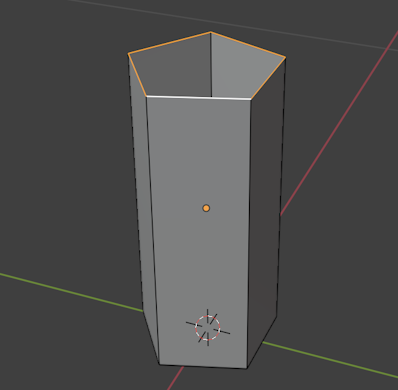
Closing the Top
- Press
Mto Merge vertices - Choose
At Center:
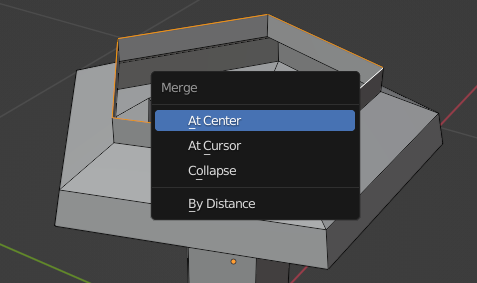
We now have a very coarse mushroom:

Tweaking the Shape
Rotate the view around and check that the shape of the mushroom is like you want it. If it’s not quite right, you can:
Alt + Clickedges to select loops on the mushroom, thenS,Move mouse,Left-Clickto scale the selected loopsG,Z,Move mouse,Left-Clickto move the selected loops up and down (in Z)
Repeat scaling and moving until you’re happy with the shape.
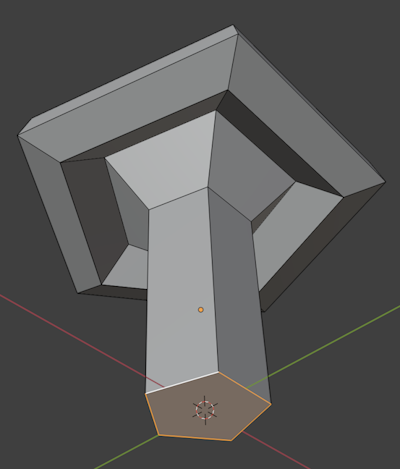
Closing the Bottom
Notice that the bottom of our mushroom is still open.
Let’s fix that.
- Select the bottom edge loop (
Alt + Left-Click) - Press
Fto form a new Face from the loop
Better Stem
Now that we’re on the bottom, let’s make the stem a little less straight.
- Press
Ctrl+Rto add a Ring Cut - Move the mouse over the stem
Left-Click- Move the ring towards the bottom of the stem
Left-Clickwhen you have something like this:
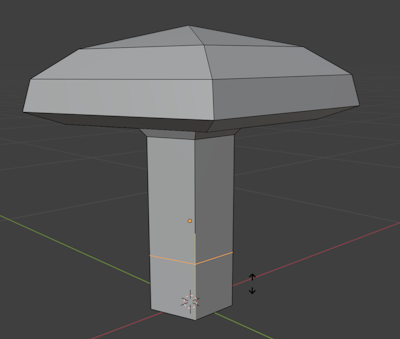
S,Move mouse,Left-Clickto scale the ring outwards a bit
More Details
Now, let’s add a bit more detail. While 5 segments are OK for the stem, the “hat” of the mushroom is probably a bit too pointy.
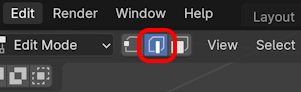
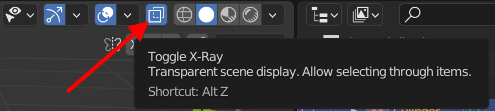
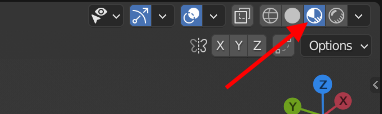
- Press
Alt + Zto toggle “X-Ray” mode, or use the button in the toolbar:
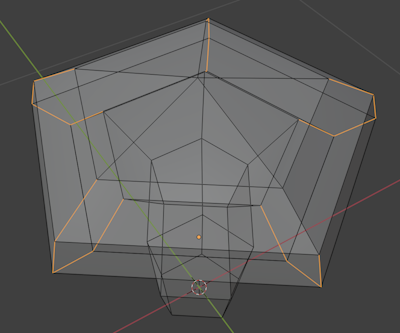
- Select the edges like shown below. There’s a couple of options:
- While **holding
Shift**,Left-Clickeach edge - While **holding
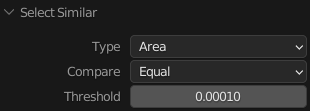
Shift**,Click and dragaround the edges - Select the edges for one corner, then press
Shift+Gand chooseFace Anglesto select similar edges.
- While **holding
If it picks up too many edges, lower the
Thresholdin the “Select Similar” options
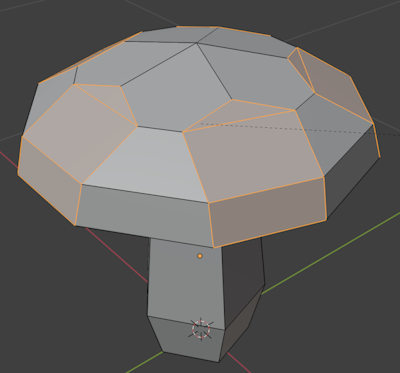
- Press
Alt + Zto toggle “X-Ray” mode off again - Press
Ctrl + Bto start the Bevel command - Move the mouse to get a good sized bevel
Left-Clickwhen you have something like this:
- Check the bottom of your mushroom. If it doesn’t look good, Undo (Ctrl+Z) a few times and try a different size bevel, or try beveling a different set of edges. It doesn’t have to look exactly like mine.
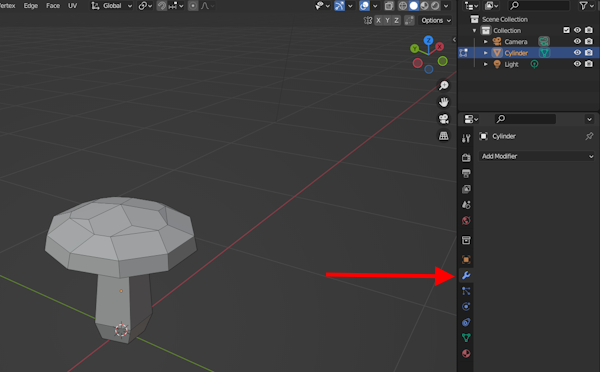
More details
Blender has a nice way to add details to any Mesh using Modifiers.
- Click the
Modifiersbutton in the Properties editor:
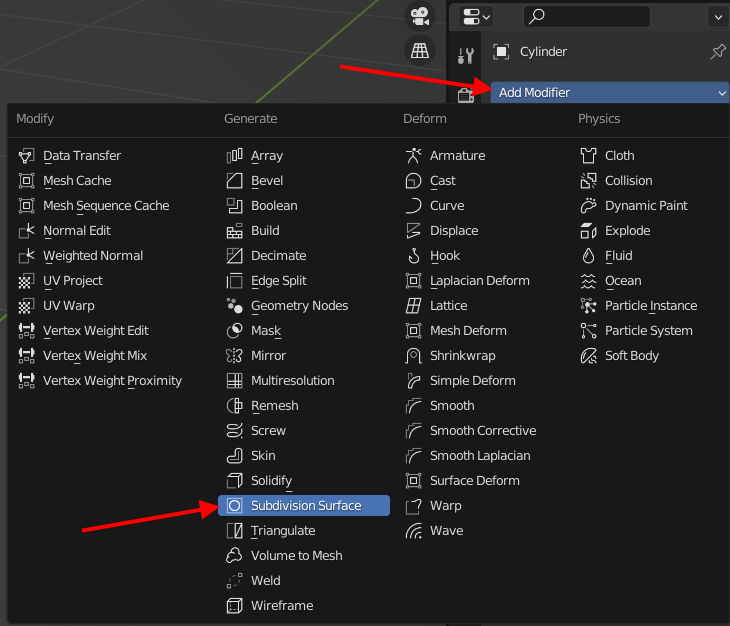
- Click
Add Modifierat the top of the Modifiers tab - Choose
Subdivision SurfaceunderGenerate:
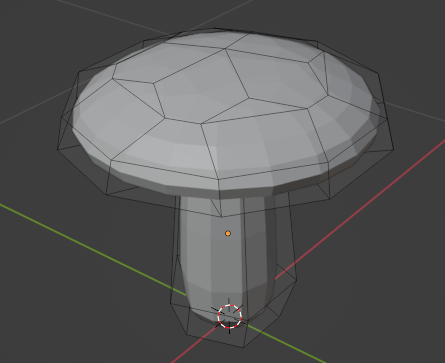
Notice how the mushroom preview is now more detailed:
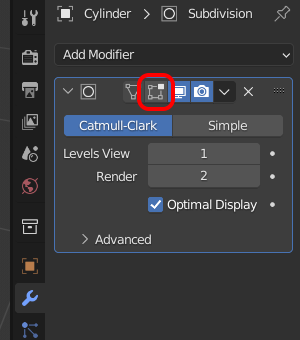
Having the subdivision shown while editing can get a little annoying, but fortunately Blender allows this to be customized.
- Click the
 button to turn off subdivision preview during editing.
- Press
Tabto switch to Object Mode - Press
Tabagain to switch back to Edit Mode
Notice how the preview changes.
Using a subdivision modifier like this allows us to keep modeling with simple geometry while having more details for preview and (later) rendering and export.
Coloring
Ok. Time for some color.
- Press
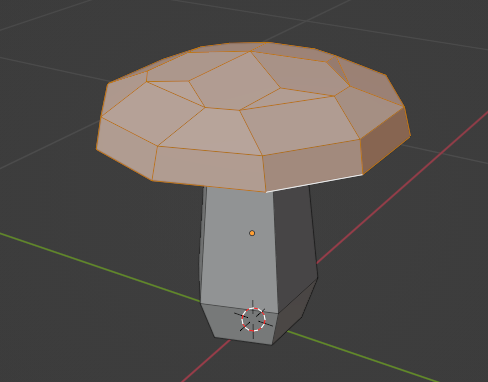
3to switch toFace Selection Mode - Select one part of the Mushroom “hat” like this:

You may also want to include faces from the underside of the “hat”.
- Press
Shift+Gand chooseAreato select the entire hat
If you don’t get exactly the right set of faces you may want to lower the
Select SimilarThreshold:
You’ll want a selection like this:
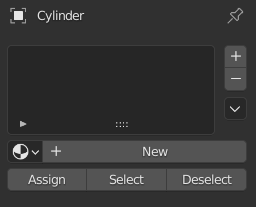
- Go to the
Materialspanel by clicking the button
 - Press the
Newbutton
- Click the colored field for
Base Color:
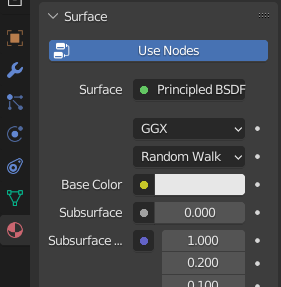
- Choose any color you’d like for the hat
- Press the
Assignbutton
You’ll notice that the preview doesn’t change. That’s because we’re in Solid viewport shading mode.
- Click the
 button in the top-right corner:
- Alternatively: Press
Z, then selectMaterial Preview
Your mushroom should now show in the color you’ve chosen. But since there’s only one material it’ll be used for the entire mushroom, despite our current selection. Let’s fix that by adding a second material for the stem.
- Create another material by pressing the
+button - Press the
Newbutton - Pick a
Base Colorsuitable for the stem - Press
Ctrl+Ito invert the selection, so the stem is selected - Press the
Assignbutton - Press
Tabto switch back to Object Mode:
Saving
If you haven’t already done this, now would be a very good time to save your Blender file.
- Press
Ctrl+Sto save
If this is the first save, Blender will ask for a name and location
Variety
- Make sure you’re in Object Mode
- Press
Shift+Dto create a copy of the mushroom - Press
Shift+Zto restrict movement to the floor (XYplane) - Move the mouse to move the copy a bit away from the original
Left-Clickto place the copy- Press
Tabwith your copy selected to edit it
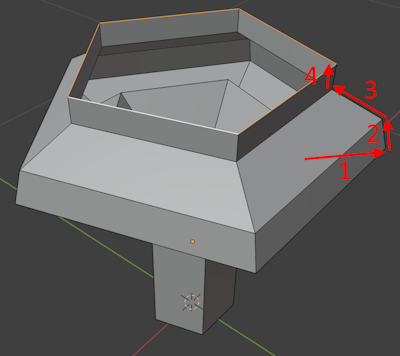
Use the following tools to make your copy slightly different.
Select things:
- Use keys
1,2and3to make changes to vertices, edges and faces respectively - Make individual selections by
Left-clicking,Holding Shiftto select multiple vertices/edges/faces Left-Click and Dragto make a box selection- Use
Shift+Gto select similar vertices/edges/faces
With something selected, make some changes:
- Use key
Gto move the selection - Use key
Sto scale the selection - Use key
Rto rotate the selection
Assign different colors to different types of mushrooms.

Here I’ve also added a few more objects for grass and dirt. You can create these using the same overall method that we used for the mushroom. Or just make a copy of a mushroom and delete (X or Delete keys) everything but the very top.
Export Rendering
If you want to save a nice image of your mushroom scene, you can Render it.
- Press
F12to open the Render window - Wait for the render to finish
- Press
Ctrl+Sto save your image as a.pngfile
If you don’t have an F12 key on your keyboard, you can:
- Press the
Renderingtab at the top of the menu - From the
Rendermenu chooseRender Image
Exporting for Game Engines
To use your Mushroom in another application like Unity or Godot, you’ll need to export it.
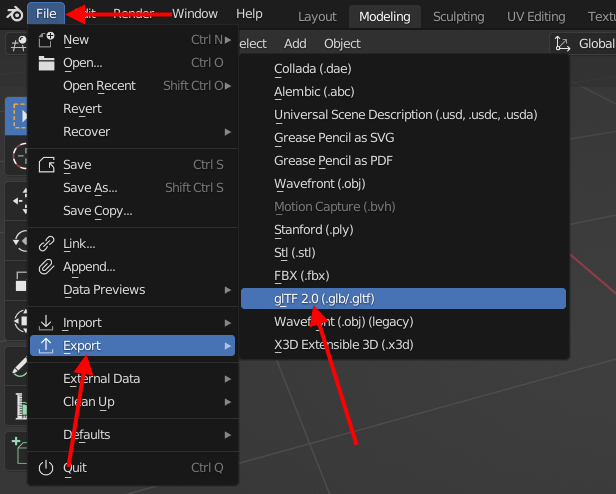
- From the
Filemenu, chooseExport - For Unity, pick
FBX (.fbx) - For Godot, pick
glTF 2.0 (.glb/.gltf)
- Navigate to a suitable location for your exported file
- Expand
Include - Enable
Selected Objects(assuming you’ve still got your Mushroom selected) - Expand
Data(for glTF) orGeometry(for FBX) - Expand
Mesh - Enable
Apply Modifiers - Type a name of your liking in the name field
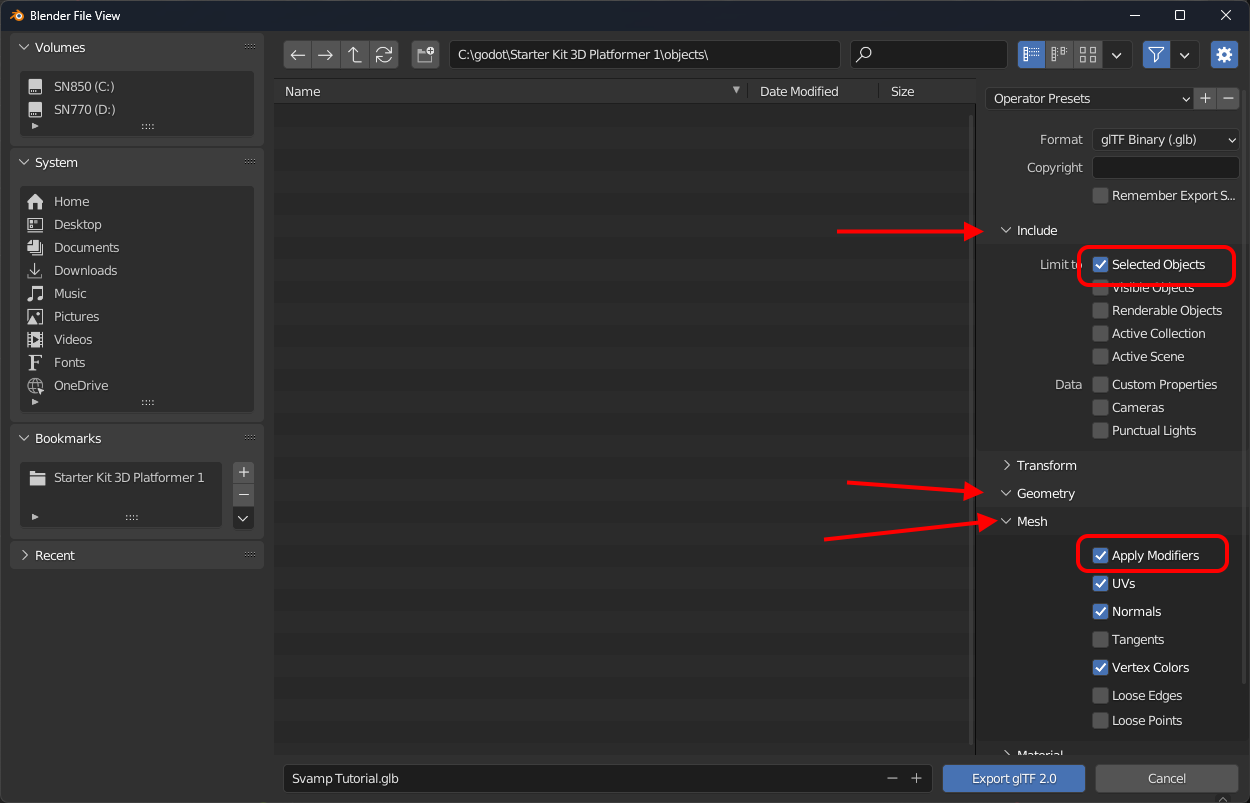
- Press
Export glTF 2.0orExport FBX